When it comes to luxury cars such as BMW, even the most minor accessories deserve precision and care. Still wondering how you can install your BMW floor mats, particularly premium ones from 3Wliners? You are at the right place. Installing your mats properly ensures safety, keeps your vehicle’s interior clean, and extends their lifespan. Let us get to it!
Introduction
Before going through the step-by-step procedure, it is worth discussing why professional installation of floor mats is not just a matter of aesthetics. Proper installation of BMW floor mats allows a neat interior, increases safety by preventing mat slippage under pedals, and conserves your investment.
In case you have already bought quality mats at 3Wliners, you are on the right path. But even the finest mats must have their installation in order to perform.
Additionally, the floor mats will also assist in upholding the classy atmosphere of your BMW interior, adding to the overall driving experience. They also provide a form of protection against moisture, dirt as well as road salts especially in places with harsh winters.
Pre-Installation Checklist
These are some of the key steps that you can take before you get started to set you up for success.
1. Remove Old Mats and Debris
Start by removing the existing mats. A clear floor ensures that your new mats sit perfectly and stay secure. Use a vacuum to clear away any dirt, dust, or debris.
2. Identify Mat Labels
Most quality mats, especially those made by 3Wliners, are clearly labeled such as "Driver Side" or "Passenger Side". This guarantees that every mat will be able to fit the curves of your particular BMW vehicle.
Pro Tip: To ensure additional security, look through the user manual of your BMW to identify any factory-fitted anchor points.
3. Inspect Factory Anchoring Systems
BMW models have different anchoring systems such as hooks, twist-locks, or Velcro. Being informed in advance will smooth the installation process.
How to Prepare Floor Mats After Unpacking?
You have already cleaned up, so let us prepare those mats!
1. Air Them Out:
Once the mats have been unpacked, mats should be allowed to air out to eliminate the enclosed packaging odor.
2. Flatten if Needed:
If the mats come rolled, set them out and roll them again in the other direction, placing them under a flat heavy object to flatten them out for a couple of hours.
3. Inspect for Fit:
Perform a dry-fit test to ensure each mat aligns with its designated spot
4. Check for Manufacturing Defects:
Although it is rare, make sure there are no tears or defects. Prepping offers a tight and secure fit that complements your car’s interior.
How to Install BMW Floor Mats: Step by Step Guide
Let's move on to the key part, installing the mats.
Step 1: Remove the Original Screw Anchor
It is advisable to start by finding the screw anchors used to fix your existing floor mats. Use a screwdriver to gently remove them, making sure the flooring stays intact. Removing these anchors will leave space to accommodate your new mats and avoid any layering effect, which might make the mats slip.
Step 2: Install the Supplied BMW Snap Clip
Next, take the BMW snap clips provided with your new mats, especially if you have chosen premium options like 3Wliners. Align the clips to the factory anchor points on your BMW's floor. Securely snap them in place; these clips will prevent the mats from moving around while you drive.
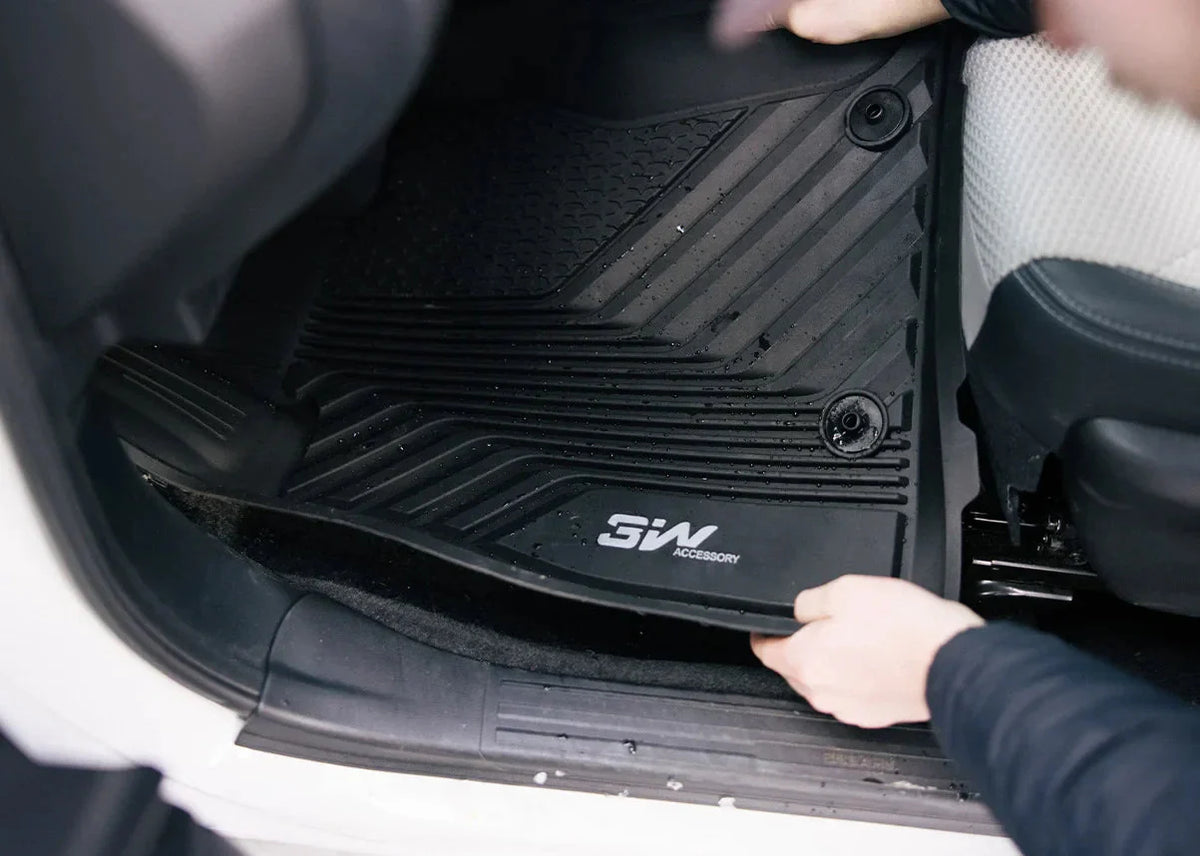
Step 3: Place the Floor Mat on Top of the Snap Anchor
Carefully align the holes on your new floor mat to correspond perfectly with the snap clips that were already mounted to the car floor. Press and hold until you hear a click sound, which indicates that your mat is securely attached. This is to avoid shifting during driving, thus improving comfort and safety.
Step 4: Adjust the Mat for a Snug Fit
Slide the mat slowly to ensure that it fits the contours of the vehicle perfectly particularly around the seats tracks and pedals. Fitting is very essential so as to avoid returning any curled edges that may interfere with driving operations. Make sure that it covers completely and adjust accordingly.
Step 5: Final Inspection
Once everything is in place, conduct a complete check. To be sure, gently tug on each of the mats to ensure that they are not going to slip. It is also important to test the pedals to ensure they move freely without obstruction. This final step guarantees both safety and a polished interior look.
How to Clean BMW All Weather Floor Mats Properly
Cleanliness in your floor mats increases the durability as well as the appearance of your car. These are some ways to effectively clean up some typical messes.
1. For Pet Hair and Fine Particles
Lift pet hair and fine dust from the mat surface by using the rubber brush or lint roller. Even a handheld vacuum made with a brush attachment may perform quite well in the elimination of these particles without leaving any scar on the material.
2. For Gum or Sticky Residue
To get rid of gum or sticky residue, place an ice cube directly on the affected area, and the material will freeze. After it has hardened, scrape it off with a plastic scraper. Finish by using a diluted soap solution and warm water to clean up the area by ensuring that any stickiness is eliminated.
3. For General Stains
Use a solution of warm water and dish soap to clean common stains. Brush softly over the stained area using a brush with a soft bristle. Wash away with fresh water and leave the mat to dry in the air before reinstalling it into the vehicle to get the best outcome.
Best Maintenance Practices to Extend Mat Lifespan
Adopt these best practices to ensure your BMW floor mats are long-lasting and in perfect condition.
1. Develop Better Daily Habits
Before stepping into your BMW, make it a habit to tap your shoes together to dislodge dirt, mud, and debris. This easy practice minimizes the volume of grime entering the car. The least amount of consumption of food and drinks inside the vehicle also assists in preventing unnecessary spills and stains that are difficult to clean.
2. Check Mat Position and Anchors Regularly
Check your floor mats periodically so that they are clipped in well, and are in proper position. Mats may move a little with time due to day to day use and movement of the feet. Their consistent readjustment helps to ensure maximum safety and avoid extra wear on the mats and the floor of the vehicle.
3. Seasonal Rotation
Seasonally rotate your sets of BMW floor mats to improve on both coverage and look. In wet or snowy months, put in all-weather mats that are effective and designed for heavy-duty defense against moisture and mud. During the dry and warm seasons, change to carpet mats to have a luxurious and plush impression within the cabin of your BMW.
Conclusion
Installing and maintaining your BMW floor mats is an easy but effective method to enhance your vehicle’s safety, cleanliness, and style. Quality products such as 3Wliners secure a perfect fit and durability. Using these steps and maintenance tips, it is possible to keep your car interior clean as well as safe for years to come.
To get quality floor mats and additional car care products, visit 3Wliners.
FAQs
1. How to get floor mats to stay in place?
Make sure that you plug in the snap or anchor clips that came with your mats. This device is specifically made to fasten the mats in a position so they cannot slip during driving.
2. Are 3Wliners mats better than OEM?
The 3Wliners mats are perfectly tailored, made of high-quality materials, and are durable than many OEM products. They are more resistant to dirt, moisture, and wear.
3. Can I stack mats for extra protection?
No, stacking mats is not recommended because it may disturb the functioning of the pedal. creating some form of safety hazard. Always use a single, well-secured mat per foot-well.
4. What should I do if the mat curls?
If your mat starts to curl, flatten it under an object that has a weight or expose it to mild heat, like sunlight, to help it regain its original shape. This avoids the edges from becoming a tripping hazard.